

A Small Producer's How-To Guide to Animal Processing
As a small scale farmer, you may want to incorporate animals into your operation to positively impact your soil health, and to provide additional revenue streams for your operation. But how do you go from having animals on your pasture to meat in your freezer? There are many points to consider, and with a little planning you can make the most of the benefits your animals can bring to your operation.
What kind of processing do you need?
One of the most important questions is: how are you planning to sell your finished meat? If you are planning to sell it in a retail setting, you will need to select a State or Federal (USDA) inspected processing facility. Federal inspection is required if you are selling the finished product across state lines (common if you are shipping meat to customers). If you are processing animals only for your own consumption, or plan to sell only to customers who will work with the butcher directly, you may instead choose a custom exempt processor.
If you are processing animals for your own consumption only, on-farm slaughter could be an option for you. Consider buying a copy of Adam Danforth’s book Butchering, which provides very thorough step-by-step information. There may also be butchers in your area who will harvest animals on-site for you on a contract basis. Ask around at your local 4-H, extension office, butcher shops, or ask other local farmers to see if anyone nearby is offering this service.
How to find processors in your area:
Be sure you start your search early. While each processor has their own timeline, some slaughter appointments are commonly made a year in advance.
Start with a Google search in your area. Another good resource is the FSIS Meat, Poultry and Egg Product Inspection Directory. You can use their search tools to locate butchers in your state/region that accept the species you are planning to harvest. Be sure to ask other producers in your area who is processing their animals – personal recommendations from other farmers can be the best place to start.
How to choose a processor:
Once you have identified some processing options, it’s time to follow up with each one to make sure you make informed decisions. Some things to consider:
- Call and talk with someone at the facility. Building a personal relationship with your butcher is important.
- Understand their fees, minimum requirements, and any other particulars.
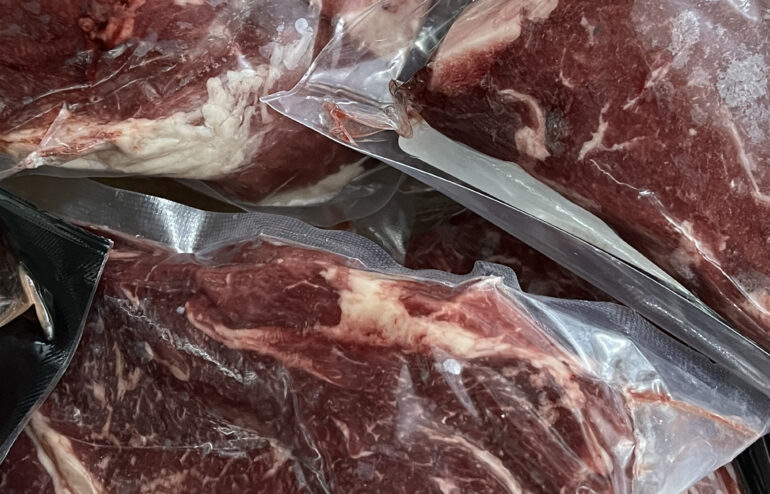
- Make sure they can provide the services you need – organic processing availability, label claims, retail labels with weights, etc. are different at each facility. Most processors will offer vacuum sealing, which will offer the longest shelf life while frozen (at least 1 year). Paper wrapping may also be available at a lower cost, but the product will need to be consumed more quickly to avoid freezer burn.
- Value-added products, like ham, bacon, and sausages may help boost your total carcass value. You may want to purchase and sample some value-added products from the processor, in order to select what best suits the taste of your customers. Be sure to review ingredient lists to make sure they meet your expectations.
- Make a facility visit ahead of time, and make sure their facility and dropoff site suits your needs and meets your standards. This is also a good time to meet their staff in person.
- Consider travel time to their location and its related stress on your animals, and wear and tear on your equipment.
- The processor may not accept appointments for all species at all times of year. Make sure to confirm that the harvest dates you have in mind align with their schedule.
Deciding what cuts and products to order
Before your drop-off date, the processor will have you fill out a form (known as a cut sheet or cutting instructions) to make sure your animals are cut to your preferences. The most important factor when filling out the cut sheet is: what do you/your customers want to eat? Are there seasonal or regional variables you should keep in mind? Are there less popular cuts you could have fabricated into more valuable items (like having chicken drumsticks made into sausages)? Make sure to work with your butcher when filling out the cut sheet, to make sure your requests are within their capability and to understand if any of your choices will incur additional fees.
What equipment is needed to transport animals to a processor?
It is very important to ensure the safety of yourself and your animals during transport. Transportation can be stressful on animals, so ensuring your equipment is properly selected and in good working order can help mitigate additional stress. Stressed animals can have a greater tendency to be injured during transport, which could lead to bruising or broken bones that can reduce carcass quality or could lead to an animal being condemned at the processor.
Small animals like chickens and rabbits may be transported in crates made for that purpose. Large animals like sheep, hogs and cattle should be transported in a livestock trailer towed by a truck. Make sure your vehicle is capable of towing the total weight of your trailer with the animals inside.
Picking up your finished product
Work with your processor to schedule a pickup date and time. Keep in mind that value-added products might take longer to produce than your standard cuts. Ask how many/what size boxes to expect, and plan cargo space in your vehicle accordingly. If you are traveling a long distance, make a plan to keep the meat cold (insulated blankets, coolers, refrigerated truck or van, etc.).
Storage post-harvest
If you are selling directly to a customer in bulk, your customer may pick up the finished product from the butcher directly and you will not need to store the meat yourself. If you are planning to sell the product in bulk at a later date, or as individual retail cuts, you will pick up the meat from the butcher and then maintain it in your own cold storage.
Acquire adequate frozen storage sized to meet your needs, such as chest/upright freezer(s), or a walk-in freezer with shelving. Consider a battery powered temperature alarm to make sure you don’t lose product in the event of an unexpected freezer failure or power outage – these alarms are often equipped with bluetooth alerts, which can be useful if your storage is in a less frequently visited location. Have a backup power plan (such as a generator) in the event of a power outage.
Find a storage organization method that works for you. Keep an inventory list to make sure you know what you have available to sell, and the date the product entered your inventory. In general, it is best to sell vacuum sealed meats within a year of packaging.
If you are selling meat to others, you may be subject to Health Department standards for inspection, safe storage and handling. Be sure to check with your local jurisdiction for accurate information in your area. In general, refrigerated meats must be kept below 40ºF and frozen meats must be kept frozen at or below 0ºF at all times. Raw poultry must be cooked or frozen within 9 days of slaughter (slaughter day is day 1). In general, other meats should be frozen with 10-14 days of packaging in order to maintain quality.
You may find it beneficial to track some data post-harvest, to better inform your management decisions in the future. Data you may consider tracking in a simple spreadsheet may include:
- Animal weights pre-harvest (if available).
- Animal hanging weights post-harvest.
- Weights of the product received back from the butcher from each harvest. You can use this to calculate your total carcass yield. You can also decide what your profit margin needs to be, and work backward to determine your retail pricing per pound/cut/animal.
- Your sales over time, in total and per cut. You may find it useful to track this information at different intervals for comparison, for instance each month, quarter and year. This data may help inform the way you fill out your cut sheets for future harvests, as you compare your sales vs. your inventory.
There are many considerations to keep in mind when deciding how to harvest animals, which can be overwhelming at first. If you have questions that we haven’t addressed here, please reach out to mail@green-acres.org and we will do our best to help.